Templates |

|

|

|

|
|
Templates |
|
|
|

|
Templates |
|
|
|
|
|
Templates |
|
|
|
|
|
|
||
We are all now familiar with the concept of templates, be it in word processing, corporate documents, branding or web blogging. In Transact Composer, the template concept goes much further, embodying:
•the look and layout of the form. including
ocolor schemes
oheaders
ographics
otypography and layout managers
omenus and form navigation
•which of the widgets are made available to form designers
•underlying scripts
•the data structure of the payload delivered to your business on form submission
•behavior of the form on mobile devices and in mobile apps ("responsive layout")
•design elements that accommodate
oaccessibility
oprivacy
osecurity
ouseability
•hooks for supplementary data passed on to Transaction Manager for analytics:
ogeolocation data
oform abandonment
oand so on
•Other chrome in Form Designer, such as the Style Choosers
•inherited elements in the form's structure panel
This is not a complete list.
If you or your organization are new to Avoka Transact, it would be a good idea to make use of Avoka's support teams to create templates suited to your corporate needs and branding. Composer itself has the tools for maintaining your templates and even for creating new templates (with different scripts and elements), but if your business needs go beyond the standard templates, samples and tutorials (given the name of "cook books"), as is so often the case in real-world business situations, you will save time and money by turning to Avoka's professional services to get at least a set of initial templates to begin producing useable forms.
This guide's Advanced Topics tries to cover, as far as is practicable, the issues involved in template construction and tuning, in scripting, business rules and so forth. The perspective required to digest all this information, though, is best gained by using Composer to produce production forms, gaining real-world experience and seeing Composer add to your bottom line.
That said, at this stage of your experience with Transact Composer you will either have:
•The standard set of templates that come with the release (such as the Maguire templates) or
•a set of corporate templates conforming to your enterprise's branding and requirements.
So, the assumption is that you have templates to go on with for the time being. You can even begin to design forms that will end up in production, after changing the templates of the form to those suitable for publication on your portal. Composer accommodates this iterative approach. We also assume that you have an Organization and Project set up for you. You can work through the Hierarchy and create your own, providing that you have been assigned the rights to do so, but these Organizations and Projects may lack sufficient resources and templates, as configuration of these is complex for beginners and best avoided at this stage if you can.
So, let us begin at the beginning.
At the Project Level, click on "Create a new form..." and fill in the Wizard:
•Give the new form a name, and an option description
•Pick a template from the dropdown list
(See here for a gallery of different templates to give just a taste of the variety of templates.)
•The next several steps and their choices are determined by the template
oCould be choices about navigation types or styling
with possible style choosers such as: Sections, Headers, Color Themes, Menus, NavBar, Button, Color.
You can experiment with these choices, via the Wireframe preview under the Style Choosers.

Choosing and previewing templates in wireframes withint the New Form wizard.
Composer 4 introduces a number ways for users to navigate through forms, and now the one form can have several navigation modes on different mobile devices depending on the responsive layout settings of the form.
But for the moment, let us discuss basic navigation concepts, and leave the complications for later, after we have covered the other concepts needed to understand the rich navigation possibilities now afforded by Composer. The basic unit of navigation is the Section, and the 3 basic navigation types treat them differently.
The whole form is on the one web page. Each section has its own heading, usually a colored bar that runs across the width of the page.
The user moves through the page by scrolling down by mouse, scroll wheel, finger swipe, two-finger trackpad gesture, and so forth.
There may be elements that stick to the viewing area, for example down the left side, but these do not change how the user moves through the form.
The form is the one web page, but sections collapse or expand as a convenience to the user. Navigation is essentially the same as Standard.
Here, each section gets a new page. The user moves through each page, usually one at a time via "Next" and "Previous" links.
Actually, the form designer can later incorporate a number of navigation choices into the form:
•strictly in sequence
the only way to navigate is through "Next" and "Previous".
•LH Lists
useful for showing users where they are now and how many wizard pages they have ahead of them. The items are not selectable
•menu selection
where the L:H LIst is selectable. Users can select another page out of order.
•restricted menu selection
where users must complete certain sections of the form before being allowed to select some of the menu items. For example, it is common that users be allowed to go back to any already-completed page via the LH Menu. but can only progress to new pages through "Next" and "Previous".
How you implement these are advanced topics.
Composer 4 allows different parts of the form to make use of the different Basic Navigation Types. Now, some sections can have Wizard-style behavior while several other sections can be on one web page.
Instead of a selection of navigation types for forms having a similar design look, the one template may offer forms that have quite different designs or styles.
You can easily change the template of a form. Just right-click on the top element of the Structure Panel's tree and select "Switch from Template...." The only coices are templates that have been assigned to the organization (see Library Advanced Features).
Be aware that some layout elements of the form may have to be altered as well, as required.

Right-clicking on the top of the Structure Panel tree
Here, we give a few examples of how templates and style choosers affect the one form's color or theme, its styling and its localization. The style choosers can also be configured (see Templates in Library Advanced Features).
The form below is a simple one with four sections for entering addresses. Some simple choices on the look of sections, of the header block (the colored rectangle with the logo), the wizard form Menu, the NavBar (which holds "Next" and "Previous"), the style of buttons (rounded, square, and the like) and Color or Theme. In these basic templates, "Color" and "Theme" are interchangeable.
Experiment with the various combinations of Style Choosers.

A basic template, and how choice of color or theme changes the appearance.
For example, changing the color or theme alters the color scheme of the form, but does not effect a radical change.

Same form, different color scheme
Some templates that go beyond the basics do produce radical changes to the form. Here is the same form with the "Maguire" template. The wireframe view here is only an approximation of how the form will appear to the user. Even basic navigation through the form has quite different features, such as the chevron-style menu at the top of the form, and this is only visible in Preview, or a Mobile slider menu.

Same form, but with a more elaborate template. Note the Preview gives a more accurate reprentation of the form's appearance.
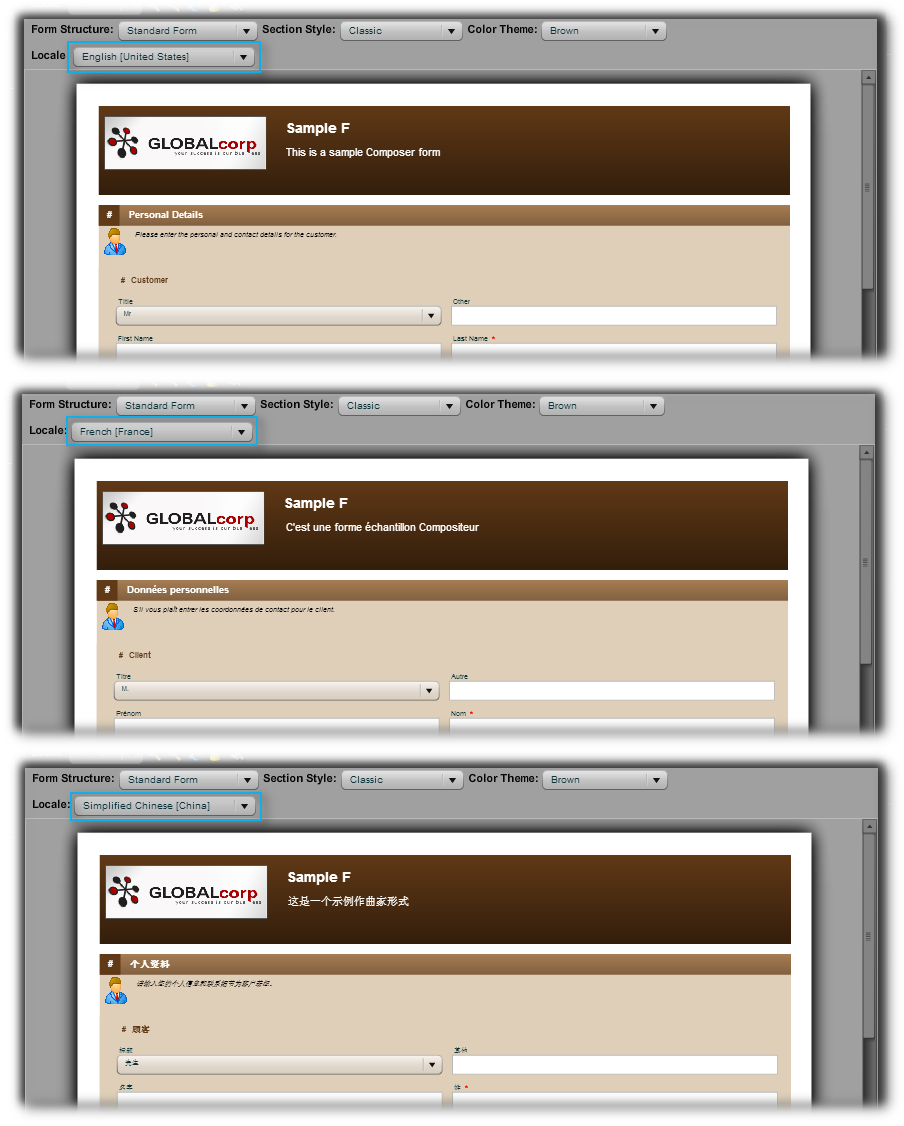
Some templates support localization. See here on how to configure and tweak this feature for a range of Locales. Once done, changing the Locale for a form in Composer is a simple matter of using the selector. Note that the following examples were automatically generated using Composer's leveraging of Google Translate, and were not checked by native speakers — usually a good idea in a production setting.